How to Add and Customize Video Captions on iPhone with Velvet
Turn spoken words into eye-catching captions with automatic transcription, customizable styles, and precise editing tools.
Captions make your videos easier to follow, more engaging, and accessible to a wider audience. Whether you're creating Instagram Reels, TikTok videos, YouTube Shorts, or podcast clips, the right captions can make a real difference.
With Velvet, you can automatically generate captions, fine-tune their timing, customize their appearance, and export your video — all directly from your iPhone.
1. Generate Captions Automatically
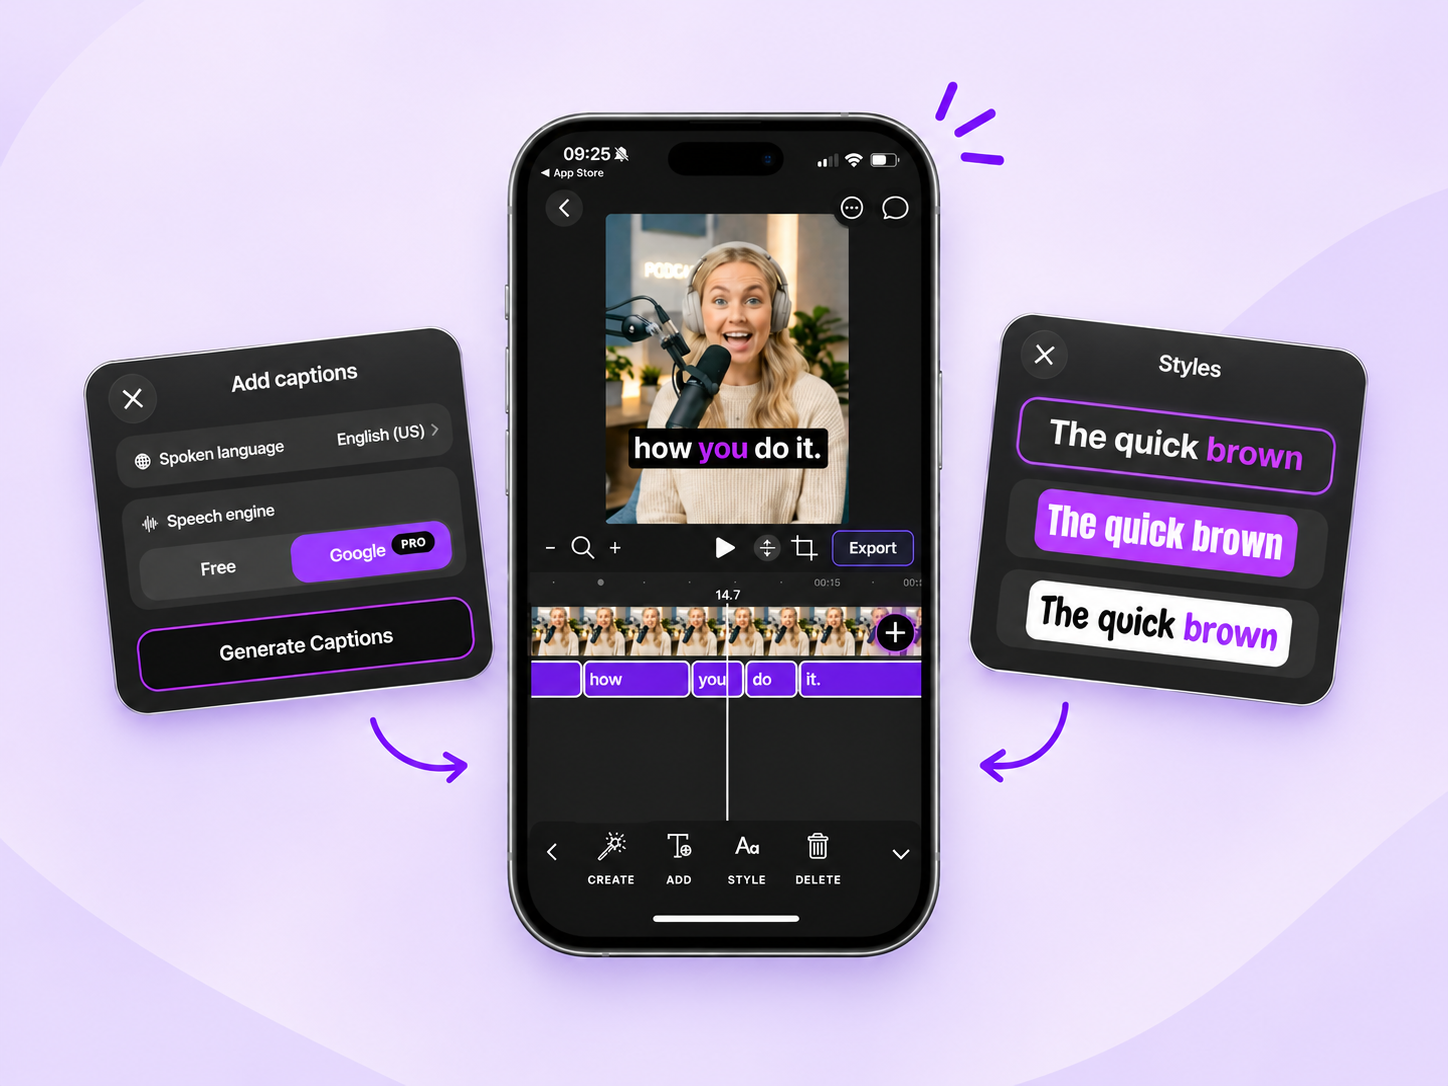
Open your video in Velvet, select Captions, and tap Create.
Choose your spoken language, preferred line length, and speech recognition engine:
- Free (Apple): On-device speech recognition.
- Google: Higher-accuracy transcription, with two free uses per day and additional access through PRO.
- Detect Speakers (PRO): Automatically identify different speakers in conversations or podcast clips.
- Translate Captions (PRO): Translate spoken content into another language.
Tap Generate Captions, and Velvet will transcribe your audio and place the captions directly onto your video and timeline.
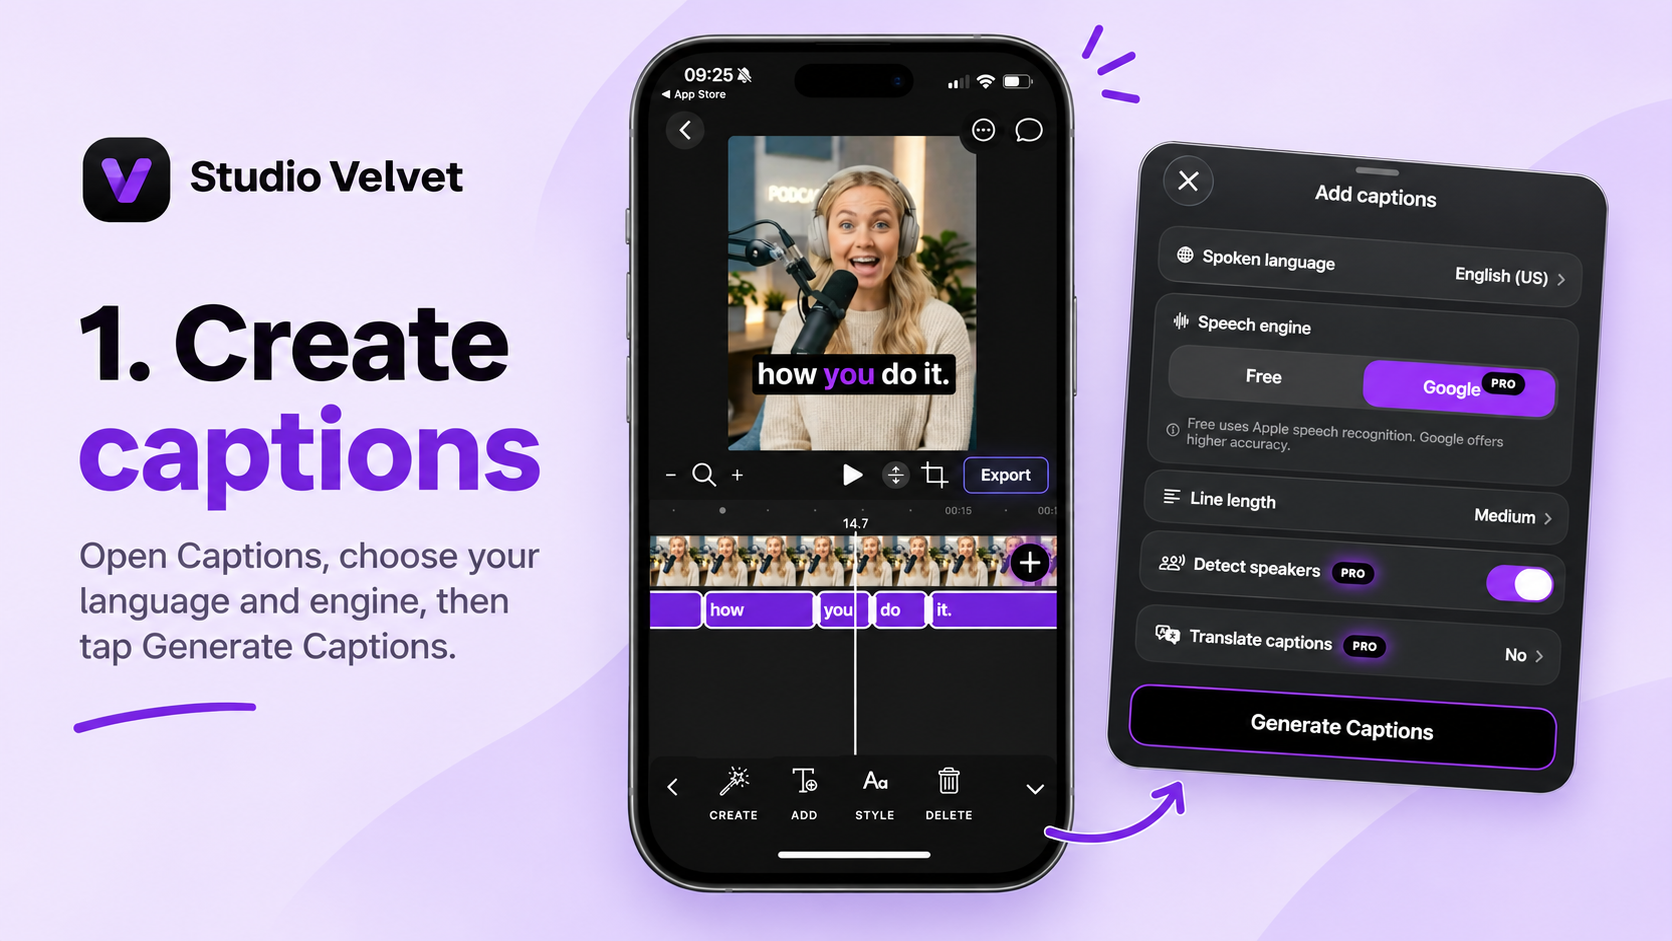
No manual transcription needed.
2. Edit and Position Your Captions
Automatic transcription is just the starting point.
Tap any caption on the video or timeline to edit its text, merge or split phrases, or adjust its timing. Drag caption edges to change their duration, or move captions along the timeline to synchronize them with your audio.
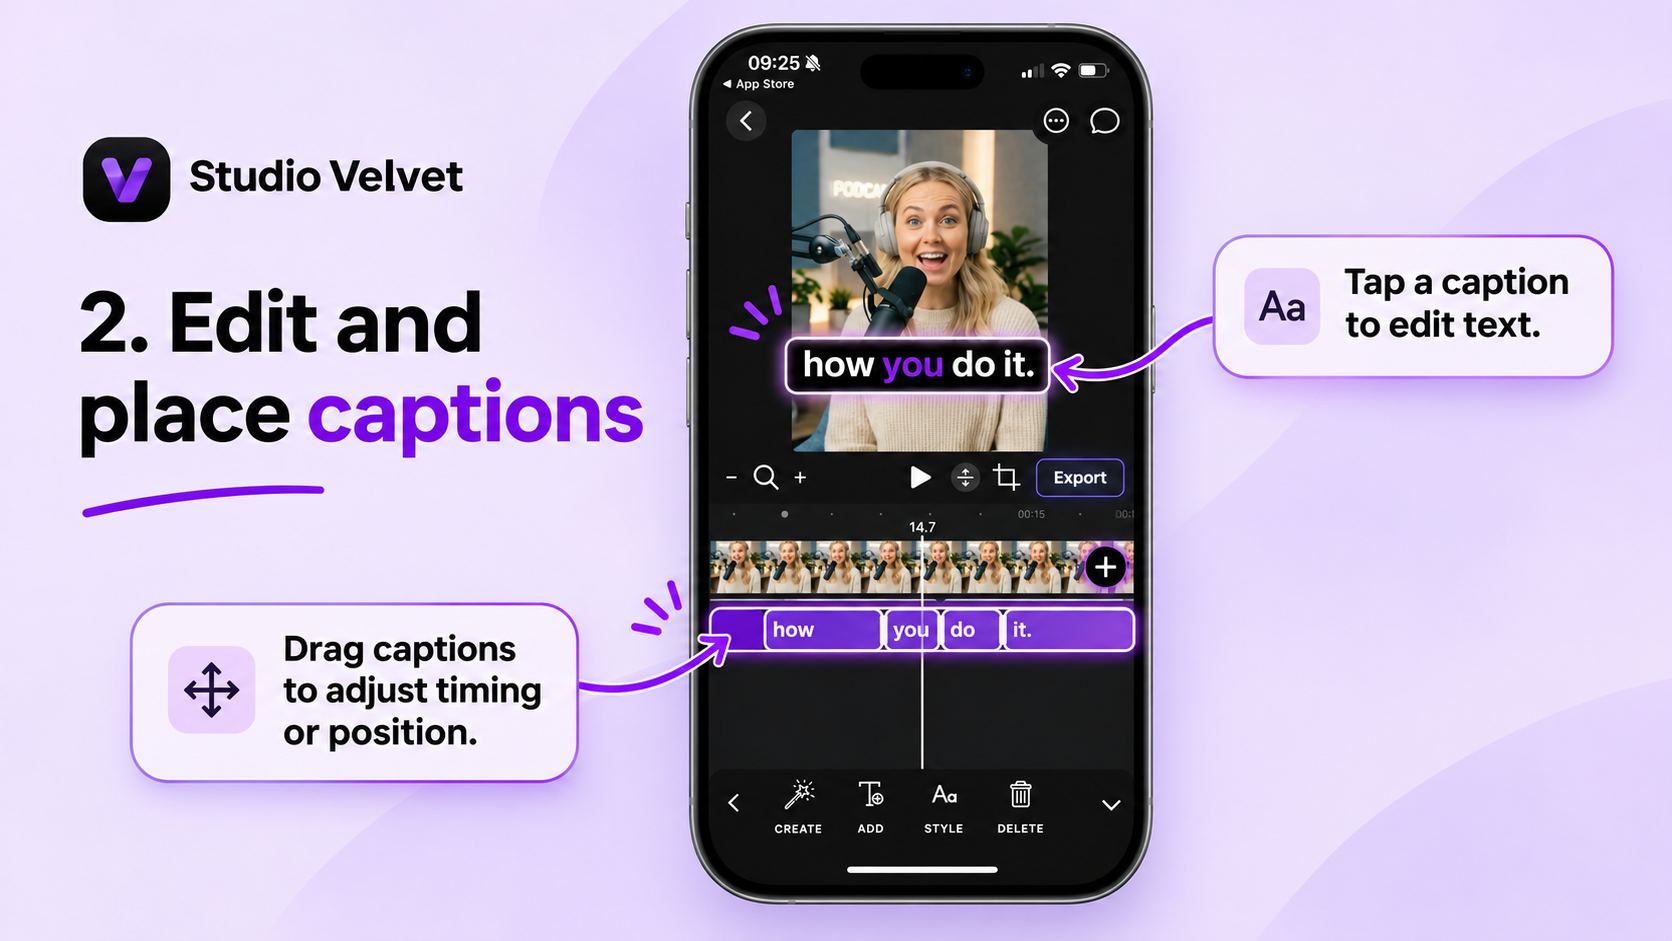
You can also drag captions directly on the video preview. Alignment guides help you position them precisely.
Working with multiple speakers? Velvet lets you organize captions by speaker, making conversations and interviews easier to follow.
3. Make Captions Match Your Style
Tap Style to explore Velvet's ready-made caption presets, or select Customize to create your own.
Personalize your captions with:
- Fonts and colors — including separate colors for actively spoken words.
- Backgrounds and effects — adjust opacity, corners, outlines, and shadows.
- Animations — add Pop or Background effects.
- Custom presets — save your favorite styles for future videos.
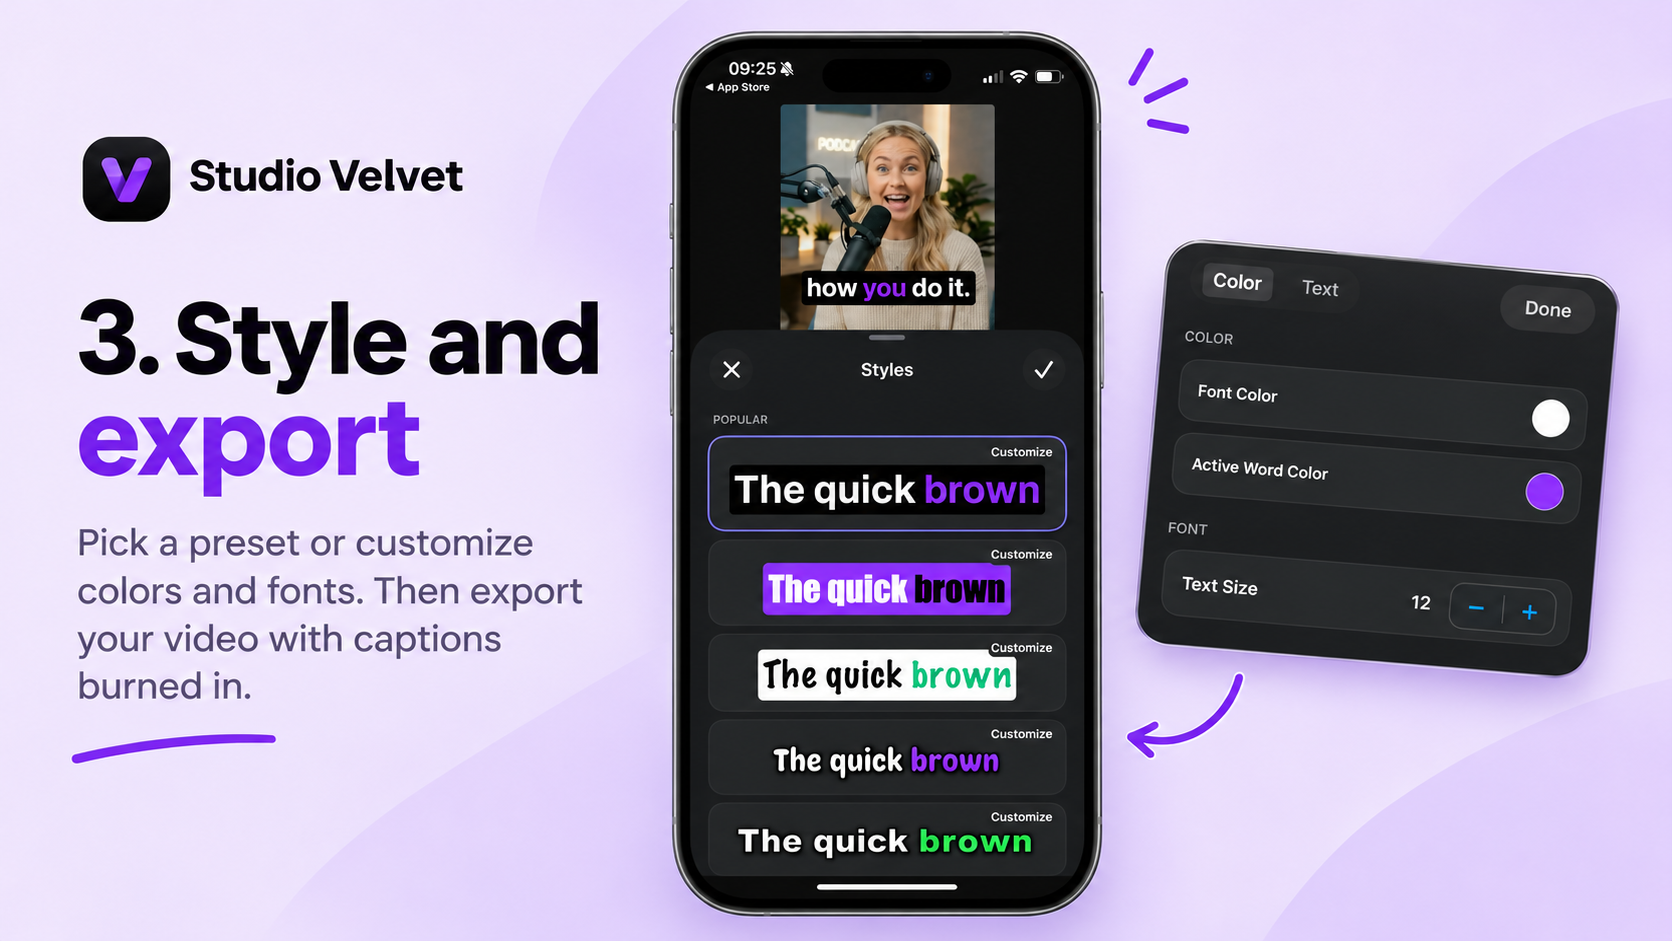
Changes appear directly in the preview, making it easy to find the perfect look.
When you're happy with the result, tap Export. Your styled captions are automatically embedded into the finished video, ready to share.
Make Every Word Count with Velvet
Great captions do more than display words — they help tell your story.
From automatic transcription to animated word highlighting and custom styling, Velvet brings everything together in one simple editing workflow.
Whether you're creating a quick social media clip or a polished podcast highlight, you can make your captions look exactly the way you want.
Generate captions. Make them your own. Create better videos with Velvet.